Xcode Simulator directories allow you to find related files for your app. Unlike on a real device, you can access all folders that represent the app your building. Exploring those directories allows you to debug and optimize accordingly.
Whether you’re debugging storage issues, optimizing app binary size, or looking to adjust the user defaults from disk: it all starts by exploring the directories related to your app.

The important of monitoring app directories
While developing your apps, it’s essential to monitor app directories frequently throughout development. At WeTransfer, we often revisit standard directories like the Documents folder to verify whether we’re not unexpectedly storing data that could fill the user’s device storage.
Your app should be a good platform citizen, meaning it should only use the storage it needs. You also want to ensure you didn’t accidentally include unused assets that increase binary app size. As an app developer, it’s essential to be aware of the Xcode Simulator directories.
Exploring Xcode Simulator directories
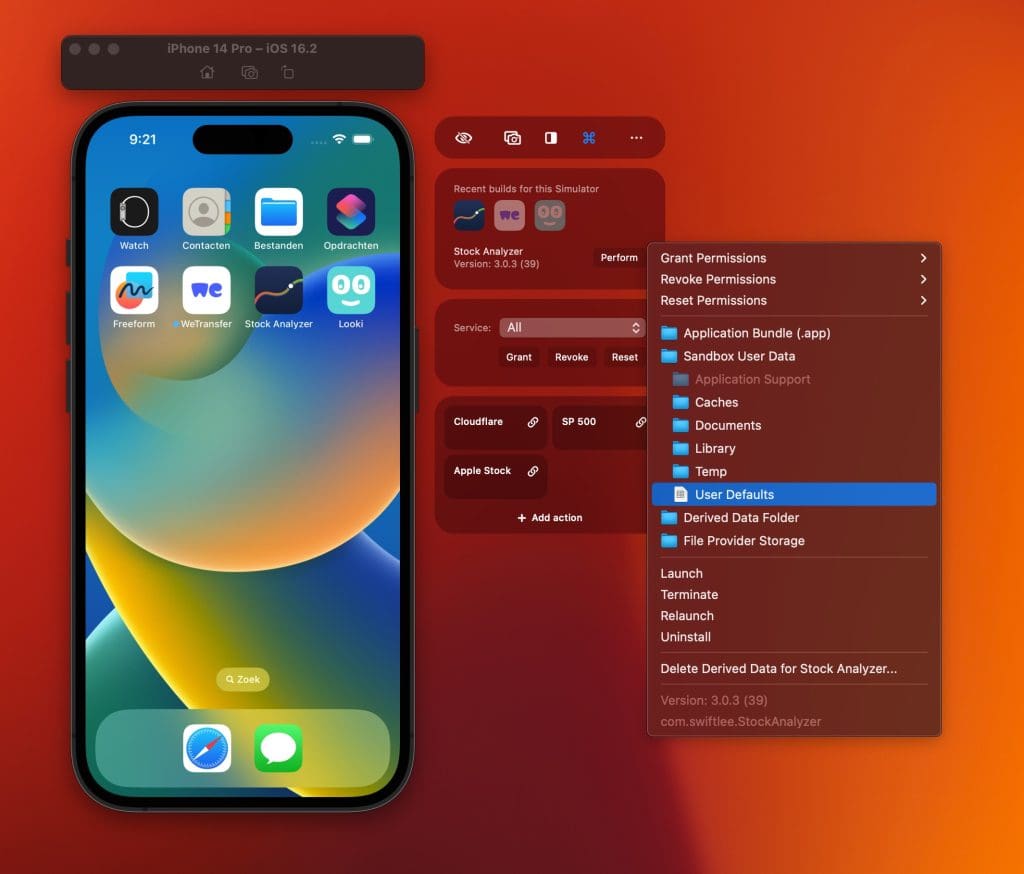
After installing your app on one of the simulators, you can explore paths to the Simulator directories. Xcode does not provide an easy way to open these directories in Finder, which is why I recommend using RocketSim:
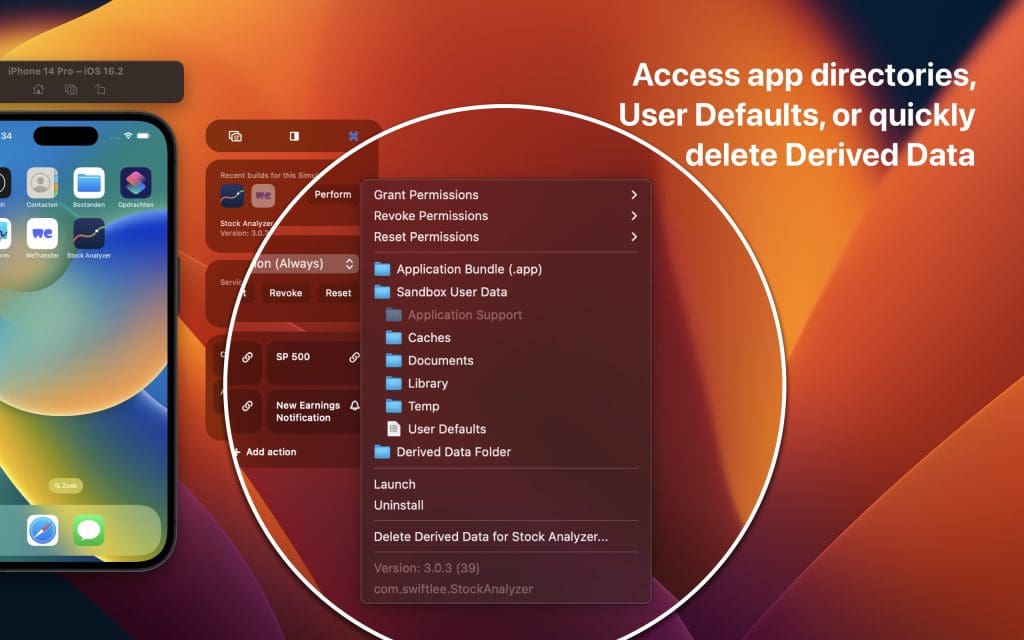
All your installed applications will appear in the RocketSim window, combined with a list of directories that link to the installed application. A grayed-out directory means it doesn’t exist, and you can click on any of the others to open the path in Finder.
Application Bundle
The Application Bundle directory represents the .app file containing all resources and binaries for your application. You can drag .app files into any simulator to install the app since it’s that complete. Any related directories, like sandbox user data, will be generated automatically on the first launch or usage.
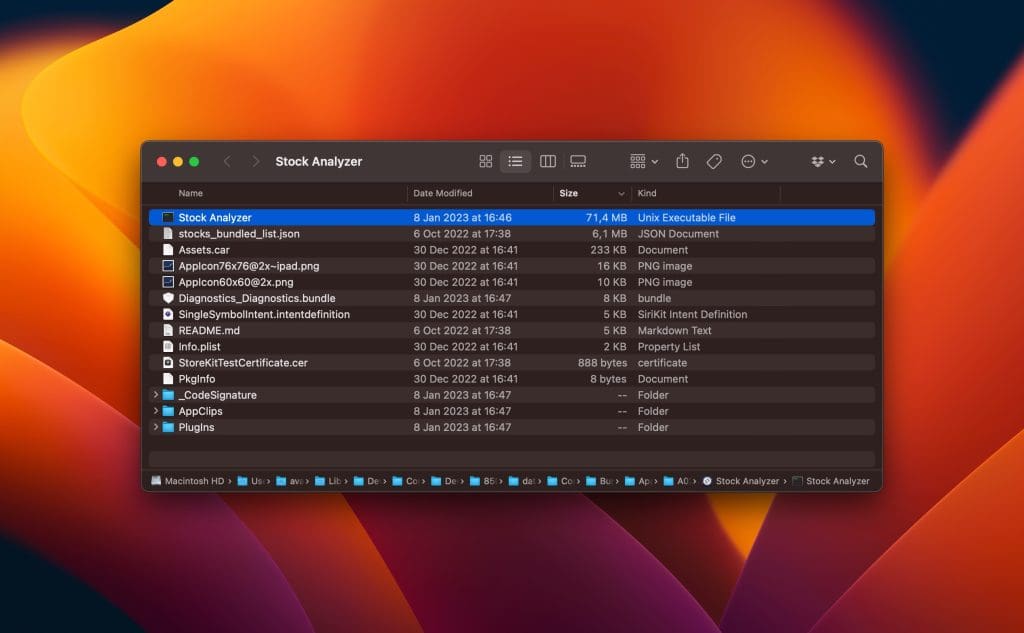
As you can see, this directory contains all kinds of data. You’ll be able to find extensions like App Clips, Intent definitions, localization files, and more.
The above image represents the application binary for Stock Analyzer. In this case, I found out that I included the README.md file, which I don’t use in the app itself. Although it’s just 5KB saved this time, it could be a much bigger file in other cases.
Sandbox User Data Directory
Each application contains user-specific data like User Defaults, Caches, Documents, and more. The Sandbox User Data directory might be one of the more interesting Simulator Directories to explore.
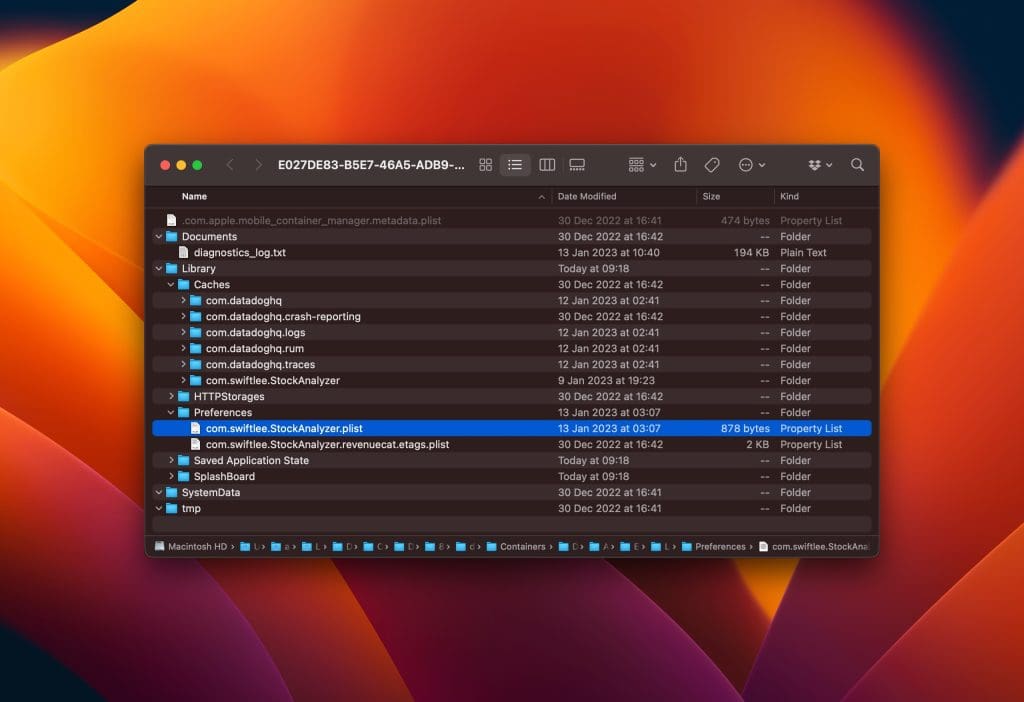
In the above screenshot, I’ve selected the preferences file containing all user defaults information. It’s worth opening this file to verify whether you’re not storing sensitive data. If you want to do this repetitively, you can access this directory directly inside RocketSim:
The caches directory allows you to find out what’s being cached by 3rd party libraries or 1st party implementations. In my case, you can see that Datadog caches quite a bit, but I also found my Core Data database and image caches during cache exploration.
The documents directory is quite empty in my case, but it could potentially contain more user data. Ensure that the existing data matches your expectation and optimize accordingly.
File Provider Storage
If you’re often working with the UIDocumentPickerViewController you’ll enjoy this directory. It allows you to add files through finder that will show up in the Simulator’s “On My Phone” directory:
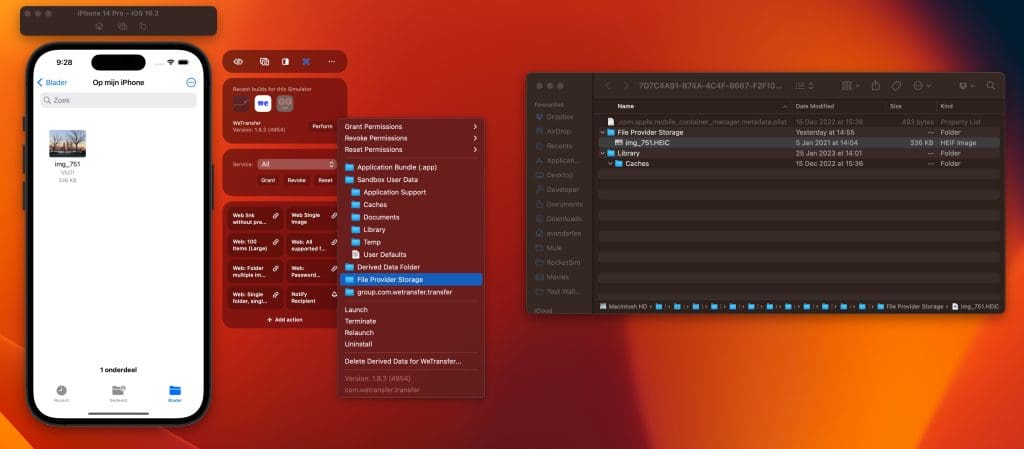
At WeTransfer, we test with lots of different files. Recently, I needed to experiment with raw HEIC files, which I added through Finder so that I could select them from the Files app.
App Groups folder
The App Groups directory shows which files are shared within your configured App Group. You can use App Groups to share things like User Defaults and files from your main app with App Extensions.

At WeTransfer, we have a few extensions that all need to access the same Core Data database, User Defaults, and shared directories. It allows us to start uploads from an extension and continue them from within the main app.
Conclusion
It’s essential skills as an app developer to be able to explore the standard Simulator directories. By regularly opening folders, you’ll better understand your app’s behavior, and you will prevent your app from storing useless or sensitive data. Combined with the technique of testing low storage mode on the SImulator, you’ll be able to optimize your apps further.
If you like to improve your Xcode knowledge, even more, check out the Xcode category page. Feel free to contact me or tweet me on Twitter if you have any additional tips or feedback.
Thanks!